Air Gap Installation
Longhorn can be installed in an air gapped environment by using a manifest file, a Helm chart, or the Rancher UI.
Requirements
- Deploy Longhorn Components images to your own registry.
- Deploy Kubernetes CSI driver components images to your own registry.
Note:
- A full list of all needed images is in longhorn-images.txt. First, download the images list by running:
wget https://raw.githubusercontent.com/longhorn/longhorn/v1.3.0/deploy/longhorn-images.txt - We provide a script, save-images.sh, to quickly pull the above
longhorn-images.txtlist. If you specify atar.gzfile name for flag--images, the script will save all images to the provided filename. In the example below, the script pulls and saves Longhorn images to the filelonghorn-images.tar.gz. You then can copy the file to your air-gap environment. On the other hand, if you don’t specify the file name, the script just pulls the list of images to your computer.wget https://raw.githubusercontent.com/longhorn/longhorn/v1.3.0/scripts/save-images.sh chmod +x save-images.sh ./save-images.sh --image-list longhorn-images.txt --images longhorn-images.tar.gz - We provide another script, load-images.sh, to push Longhorn images to your private registry. If you specify a
tar.gzfile name for flag--images, the script loads images from thetarfile and pushes them. Otherwise, it will find images in your local Docker and push them. In the example below, the script loads images from the filelonghorn-images.tar.gzand pushes them to<YOUR-PRIVATE-REGISTRY>wget https://raw.githubusercontent.com/longhorn/longhorn/v1.3.0/scripts/load-images.sh chmod +x load-images.sh ./load-images.sh --image-list longhorn-images.txt --images longhorn-images.tar.gz --registry <YOUR-PRIVATE-REGISTRY> - For more options with using the scripts, see flag
--help:./save-images.sh --help ./load-images.sh --help
Using a Manifest File
Get Longhorn Deployment manifest file
wget https://raw.githubusercontent.com/longhorn/longhorn/v1.3.0/deploy/longhorn.yamlCreate Longhorn namespace
kubectl create namespace longhorn-systemIf private registry require authentication, Create
docker-registrysecret inlonghorn-systemnamespace:kubectl -n longhorn-system create secret docker-registry <SECRET_NAME> --docker-server=<REGISTRY_URL> --docker-username=<REGISTRY_USER> --docker-password=<REGISTRY_PASSWORD>Add your secret name
SECRET_NAMEtoimagePullSecrets.namein the following resourceslonghorn-driver-deployerDeploymentlonghorn-managerDaemonSetlonghorn-uiDeployment
Example:
apiVersion: apps/v1
kind: Deployment
metadata:
  labels:
    app: longhorn-ui
  name: longhorn-ui
  namespace: longhorn-system
spec:
  replicas: 1
  selector:
    matchLabels:
      app: longhorn-ui
  template:
    metadata:
      labels:
        app: longhorn-ui
    spec:
      containers:
      - name: longhorn-ui
        image: longhornio/longhorn-ui:v0.8.0
        ports:
        - containerPort: 8000
        env:
          - name: LONGHORN_MANAGER_IP
            value: "http://longhorn-backend:9500"
      imagePullSecrets:
      - name: <SECRET_NAME>                          ## Add SECRET_NAME here
      serviceAccountName: longhorn-service-account
Apply the following modifications to the manifest file
Modify Kubernetes CSI driver components environment variables in
longhorn-driver-deployerDeployment point to your private registry images- CSI_ATTACHER_IMAGE
- CSI_PROVISIONER_IMAGE
- CSI_NODE_DRIVER_REGISTRAR_IMAGE
- CSI_RESIZER_IMAGE
- CSI_SNAPSHOTTER_IMAGE
- name: CSI_ATTACHER_IMAGE
  value: <REGISTRY_URL>/csi-attacher:<CSI_ATTACHER_IMAGE_TAG>
- name: CSI_PROVISIONER_IMAGE
  value: <REGISTRY_URL>/csi-provisioner:<CSI_PROVISIONER_IMAGE_TAG>
- name: CSI_NODE_DRIVER_REGISTRAR_IMAGE
  value: <REGISTRY_URL>/csi-node-driver-registrar:<CSI_NODE_DRIVER_REGISTRAR_IMAGE_TAG>
- name: CSI_RESIZER_IMAGE
  value: <REGISTRY_URL>/csi-resizer:<CSI_RESIZER_IMAGE_TAG>
- name: CSI_SNAPSHOTTER_IMAGE
  value: <REGISTRY_URL>/csi-snapshotter:<CSI_SNAPSHOTTER_IMAGE_TAG>
Modify Longhorn images to point to your private registry images
longhornio/longhorn-manager
image: <REGISTRY_URL>/longhorn-manager:<LONGHORN_MANAGER_IMAGE_TAG>longhornio/longhorn-engine
image: <REGISTRY_URL>/longhorn-engine:<LONGHORN_ENGINE_IMAGE_TAG>longhornio/longhorn-instance-manager
image: <REGISTRY_URL>/longhorn-instance-manager:<LONGHORN_INSTANCE_MANAGER_IMAGE_TAG>longhornio/longhorn-share-manager
image: <REGISTRY_URL>/longhorn-share-manager:<LONGHORN_SHARE_MANAGER_IMAGE_TAG>longhornio/longhorn-ui
image: <REGISTRY_URL>/longhorn-ui:<LONGHORN_UI_IMAGE_TAG>
Example:
apiVersion: apps/v1
kind: Deployment
metadata:
  labels:
    app: longhorn-ui
  name: longhorn-ui
  namespace: longhorn-system
spec:
  replicas: 1
  selector:
    matchLabels:
      app: longhorn-ui
  template:
    metadata:
      labels:
        app: longhorn-ui
    spec:
      containers:
      - name: longhorn-ui
        image: <REGISTRY_URL>/longhorn-ui:<LONGHORN_UI_IMAGE_TAG>   ## Add image name and tag here
        ports:
        - containerPort: 8000
        env:
          - name: LONGHORN_MANAGER_IP
            value: "http://longhorn-backend:9500"
      imagePullSecrets:
      - name: <SECRET_NAME>
      serviceAccountName: longhorn-service-account
Deploy Longhorn using modified manifest file
kubectl apply -f longhorn.yaml
Using a Helm Chart
In v1.3.0, Longhorn automatically adds <REGISTRY_URL> prefix to images. You simply need to set the registryUrl parameters to pull images from your private registry.
Note: Once you set registryUrl to your private registry, Longhorn tries to pull images from the registry exclusively. Make sure all Longhorn components’ images are in the registry otherwise Longhorn will fail to pull images.
Use default image name
If you keep the images’ names as recommended here, you only need to do the following steps:
Clone the Longhorn repo:
git clone https://github.com/longhorn/longhorn.gitIn
chart/values.yamlSpecify
Private registry URL. If the registry requires authentication, specifyPrivate registry user,Private registry password, andPrivate registry secret. Longhorn will automatically generate a secret with the those information and use it to pull images from your private registry.defaultSettings: registrySecret: <SECRET_NAME> privateRegistry: registryUrl: <REGISTRY_URL> registryUser: <REGISTRY_USER> registryPasswd: <REGISTRY_PASSWORD> registrySecret: <REGISTRY_SECRET_NAME>
Use custom image name
If you want to use custom images’ names, you can use the following steps:
Clone longhorn repo
git clone https://github.com/longhorn/longhorn.gitIn
chart/values.yamlNote: Do not include the private registry prefix, it will be added automatically. e.g: if your image is
example.com/username/longhorn-manager, useusername/longhorn-managerin the following charts.Specify Longhorn images and tag:
image:
  longhorn:
    engine:
      repository: longhornio/longhorn-engine
      tag: <LONGHORN_ENGINE_IMAGE_TAG>
    manager:
      repository: longhornio/longhorn-manager
      tag: <LONGHORN_MANAGER_IMAGE_TAG>
    ui:
      repository: longhornio/longhorn-ui
      tag: <LONGHORN_UI_IMAGE_TAG>
    instanceManager:
      repository: longhornio/longhorn-instance-manager
      tag: <LONGHORN_INSTANCE_MANAGER_IMAGE_TAG>
    shareManager:
      repository: longhornio/longhorn-share-manager
      tag: <LONGHORN_SHARE_MANAGER_IMAGE_TAG>
Specify CSI Driver components images and tag:
  csi:
    attacher:
      repository: longhornio/csi-attacher
      tag: <CSI_ATTACHER_IMAGE_TAG>
    provisioner:
      repository: longhornio/csi-provisioner
      tag: <CSI_PROVISIONER_IMAGE_TAG>
    nodeDriverRegistrar:
      repository: longhornio/csi-node-driver-registrar
      tag: <CSI_NODE_DRIVER_REGISTRAR_IMAGE_TAG>
    resizer:
      repository: longhornio/csi-resizer
      tag: <CSI_RESIZER_IMAGE_TAG>
    snapshotter:
      repository: longhornio/csi-snapshotter
      tag: <CSI_SNAPSHOTTER_IMAGE_TAG>
Specify
Private registry URL. If the registry requires authentication, specifyPrivate registry user,Private registry password, andPrivate registry secret. Longhorn will automatically generate a secret with the those information and use it to pull images from your private registry.defaultSettings: registrySecret: <SECRET_NAME> privateRegistry: registryUrl: <REGISTRY_URL> registryUser: <REGISTRY_USER> registryPasswd: <REGISTRY_PASSWORD>
Install Longhorn
Helm2
helm install ./chart --name longhorn --namespace longhorn-systemHelm3
kubectl create namespace longhorn-systemhelm install longhorn ./chart --namespace longhorn-system
Using a Rancher App
Use default image name
If you keep the images’ names as recommended here, you only need to do the following steps:
In the
Private Registry Settingssection specify:- Private registry URL
- Private registry user
- Private registry password
- Private registry secret name
Longhorn will automatically generate a secret with the those information and use it to pull images from your private registry.
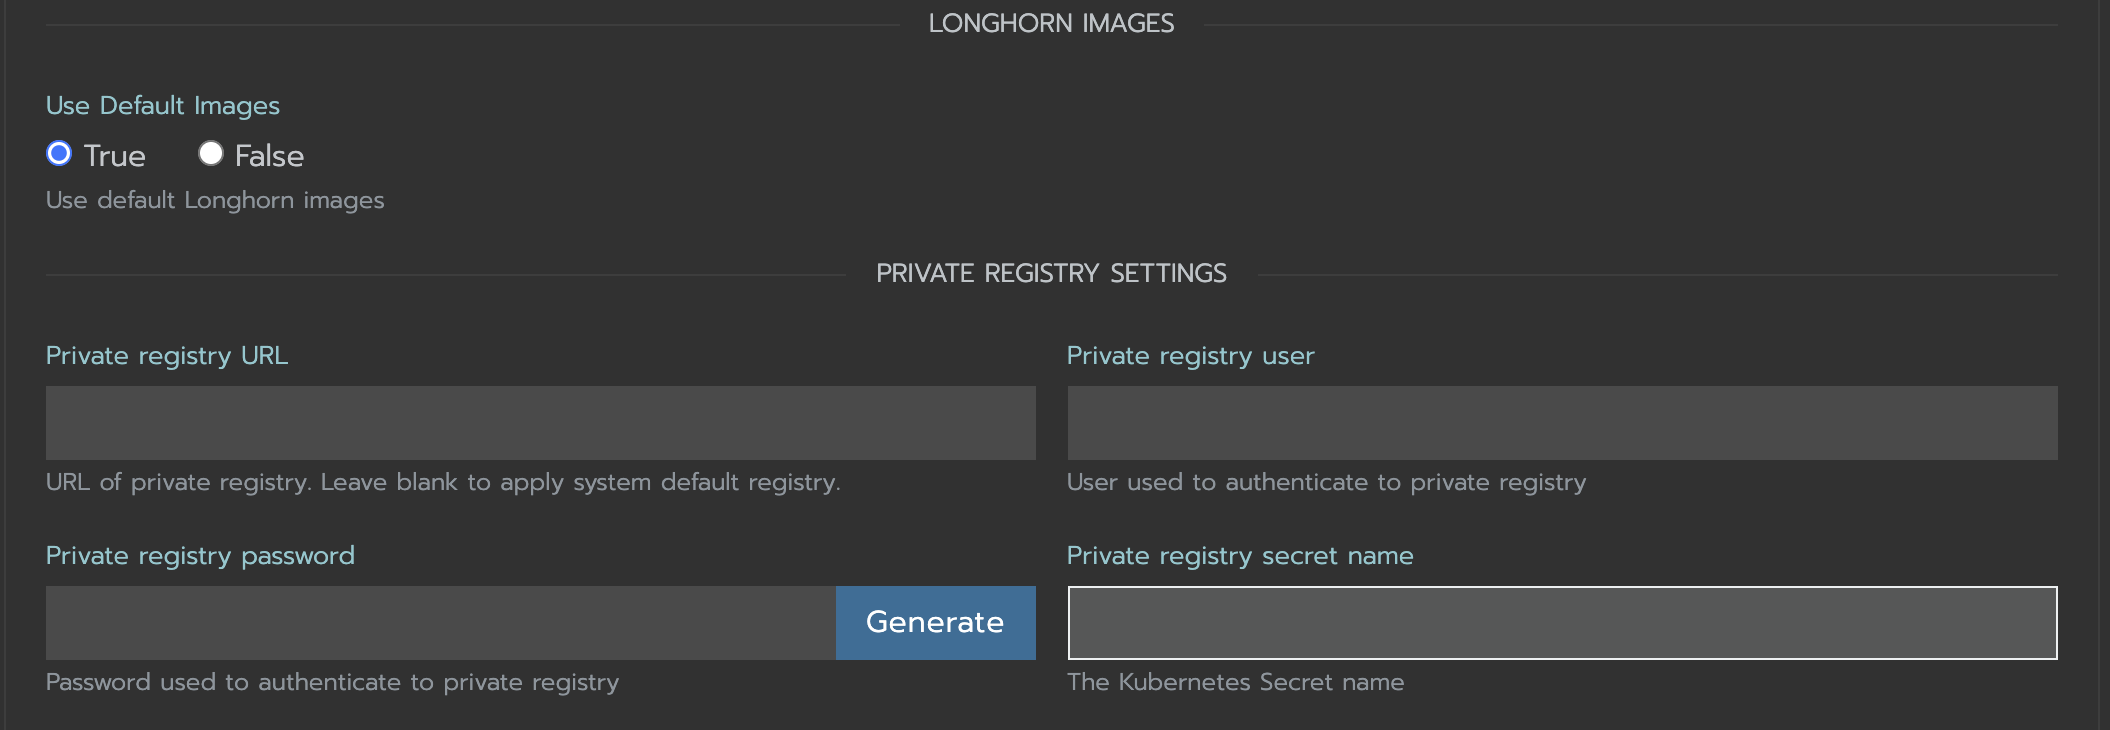
Use custom image name
If you want to use custom images’ names, you can set
Use Default ImagestoFalseand specify images’ names.Note: Do not include the private registry prefix, it will be added automatically. e.g: if your image is
example.com/username/longhorn-manager, useusername/longhorn-managerin the following charts.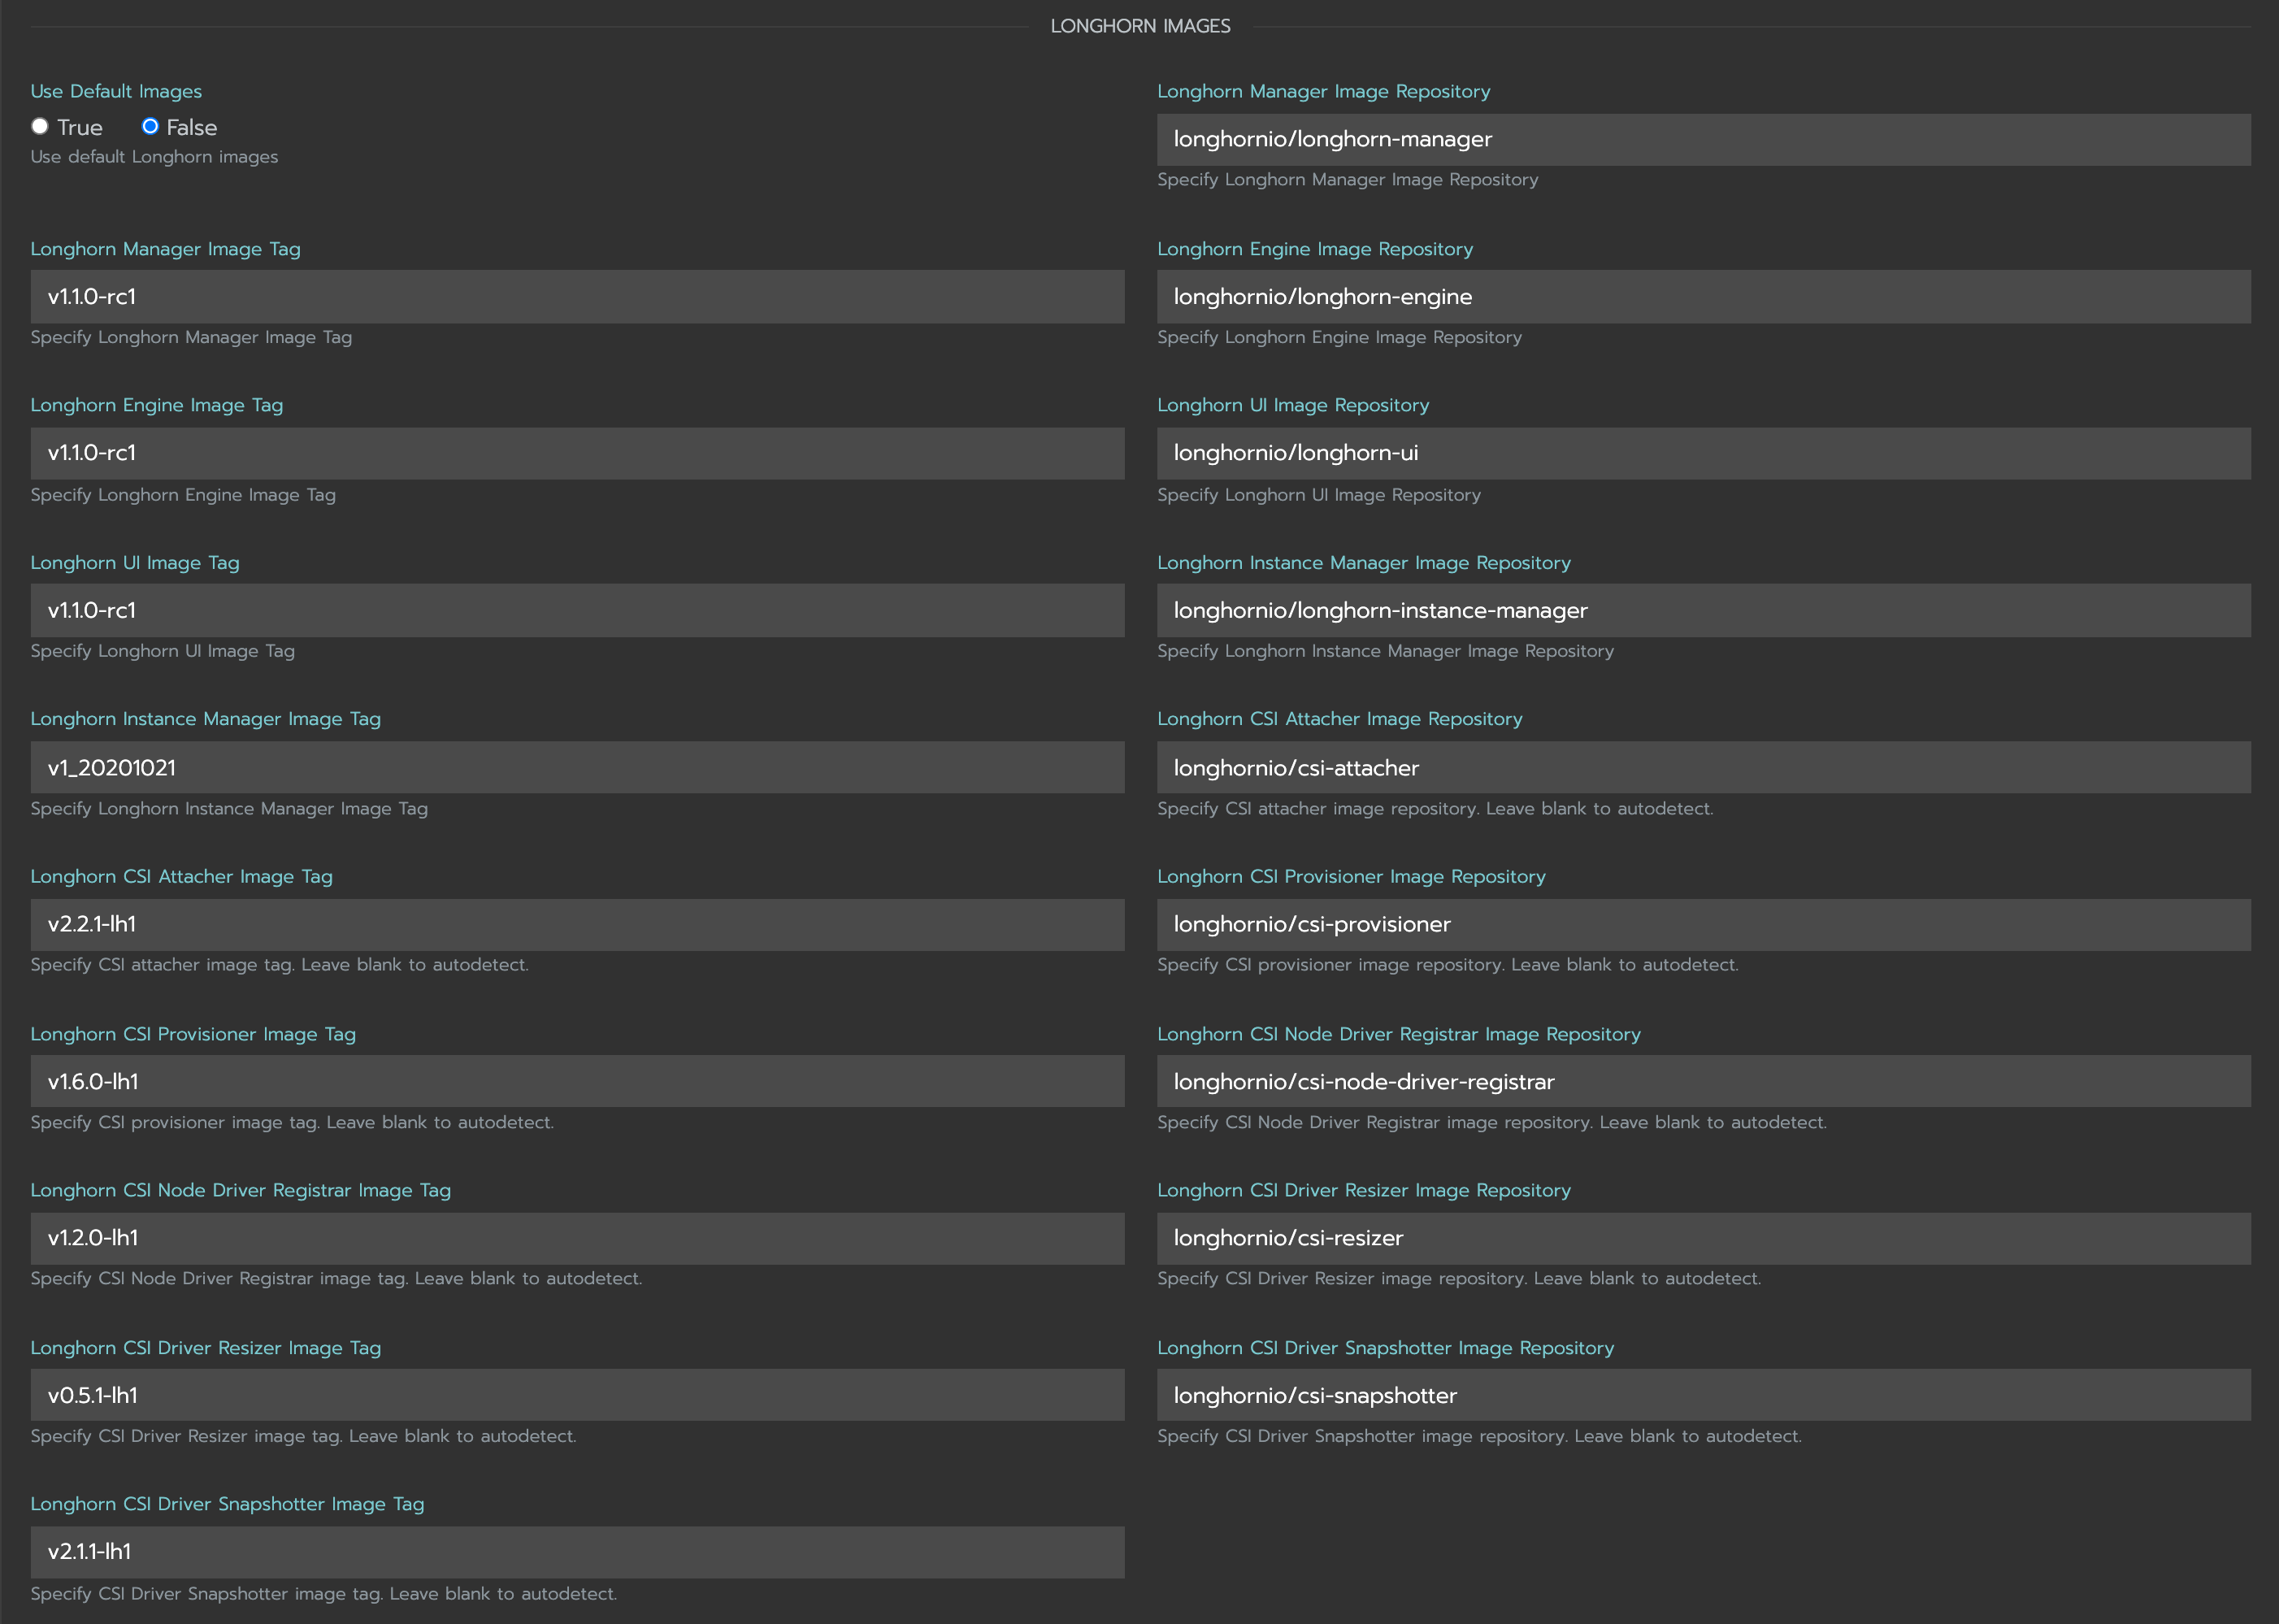
Specify
Private registry URL. If the registry requires authentication, specifyPrivate registry user,Private registry password, andPrivate registry secret name. Longhorn will automatically generate a secret with the those information and use it to pull images from your private registry.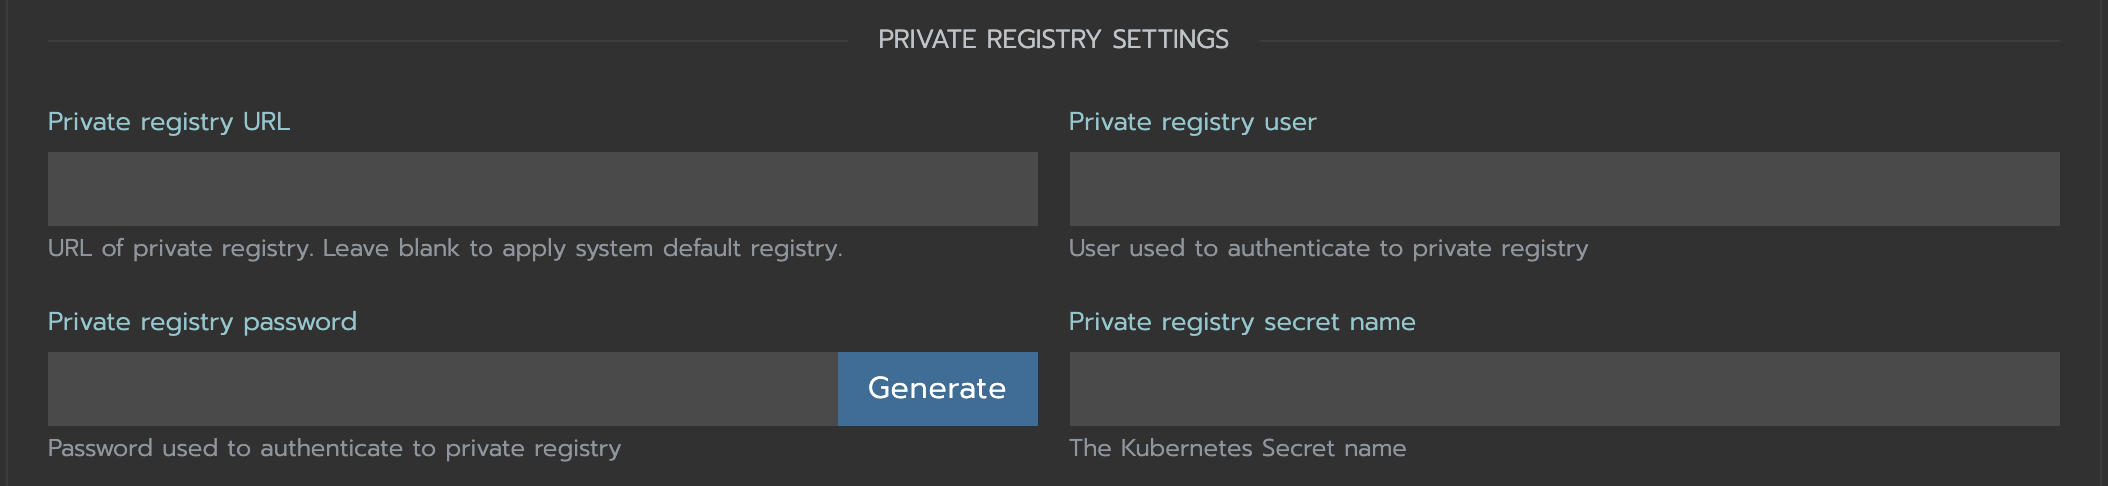
Troubleshooting
For Helm/Rancher installation, if user forgot to submit a secret to authenticate to private registry, longhorn-manager DaemonSet will fail to create.
Create the Kubernetes secret
kubectl -n longhorn-system create secret docker-registry <SECRET_NAME> --docker-server=<REGISTRY_URL> --docker-username=<REGISTRY_USER> --docker-password=<REGISTRY_PASSWORD>Create
registry-secretsetting object manually.apiVersion: longhorn.io/v1beta2 kind: Setting metadata: name: registry-secret namespace: longhorn-system value: <SECRET_NAME>kubectl apply -f registry-secret.ymlDelete Longhorn and re-install it again.
Helm2
helm uninstall ./chart --name longhorn --namespace longhorn-systemhelm install ./chart --name longhorn --namespace longhorn-systemHelm3
helm uninstall longhorn ./chart --namespace longhorn-systemhelm install longhorn ./chart --namespace longhorn-system
Recommendation:
It’s highly recommended not to manipulate image tags, especially instance manager image tags such as v1_20200301, because we intentionally use the date to avoid associating it with a Longhorn version.
The images of Longhorn’s components are hosted in Dockerhub under the longhornio account. For example, longhornio/longhorn-manager:v1.3.0. It’s recommended to keep the account name, longhornio, the same when you push the images to your private registry. This helps avoid unnecessary configuration issues.
© 2019-2025 Longhorn Authors | Documentation Distributed under CC-BY-4.0
© 2025 The Linux Foundation. All rights reserved. The Linux Foundation has registered trademarks and uses trademarks. For a list of trademarks of The Linux Foundation, please see our Trademark Usage page.