Volume Size
In this section, you’ll have a better understanding of concepts related to volume size.
Volume Size:
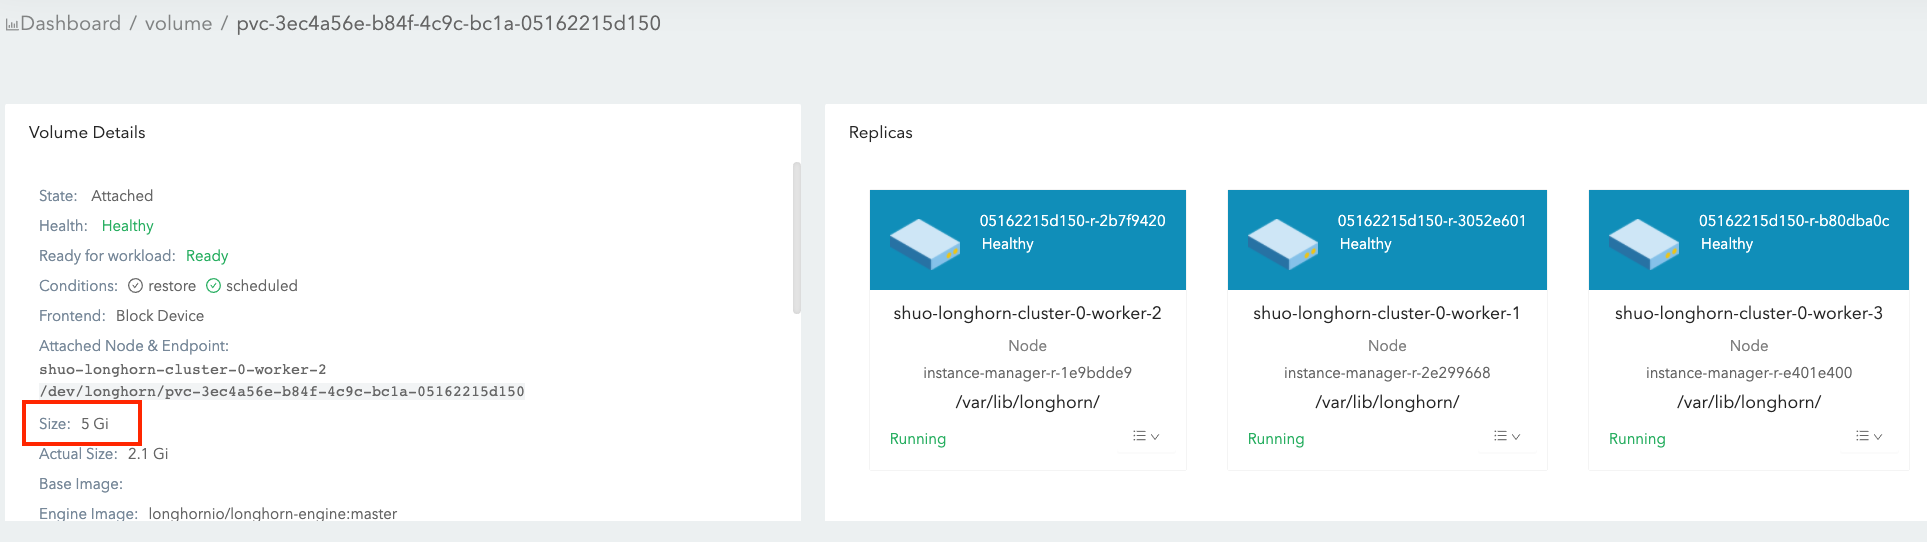
- It is what you set during the volume creation, and we will call it nominal size in this doc to avoid ambiguity.
- Since the volume itself is just a CRD object in Kubernetes and the data is stored in each replica, this is actually the nominal size of each replica.
- The reason we call this field as “nominal size” is that Longhorn replicas are using sparse files to store data and this value is the apparent size of the sparse files (the maximum size to which they may expand). The actual size used by each replica is not equal to this nominal size.
- Based on this nominal size, the replicas will be scheduled to those nodes that have enough allocatable space during the volume creation. (See this doc for more info about node allocation size.)
- The value of nominal size determines the max available space when the volume is in use. In other words, the current active data size hold by a volume cannot be greater than its nominal size.
Volume Actual Size

- The actual size indicates the actual space used by each replica on the corresponding node.
- Since all historical data stored in the snapshots and active data will be calculated into the actual size, the final value can be greater than the nominal size.
- The actual size will be shown only when the volume is running.
An example that helps understand volume Size and volume Actual size:
Here, we will have an example that explains how volume size and actual size get changed after a bunch of I/O and snapshot related operations.

The illustration presents the the file organazation of one replica. The volume head and snapshots are actually sparse files, which we mentioned above.
- Create a 5Gi volume, then attach and mount it on a node. See Figure 1 of the illustration.
- For this empty volume, the nominal
sizeis 5Gi and theactual sizeis almost 0. - There is some meta info in the volume hence the
actual sizeis not exactly 0.
- For this empty volume, the nominal
- Write 2Gi data (data#1) in the volume mount point and take a snapshot (snapshot#1). See Figure 2 of the illustration.
- Now data#1 is stored in snapshot#1 and the
actual sizeis 2Gi.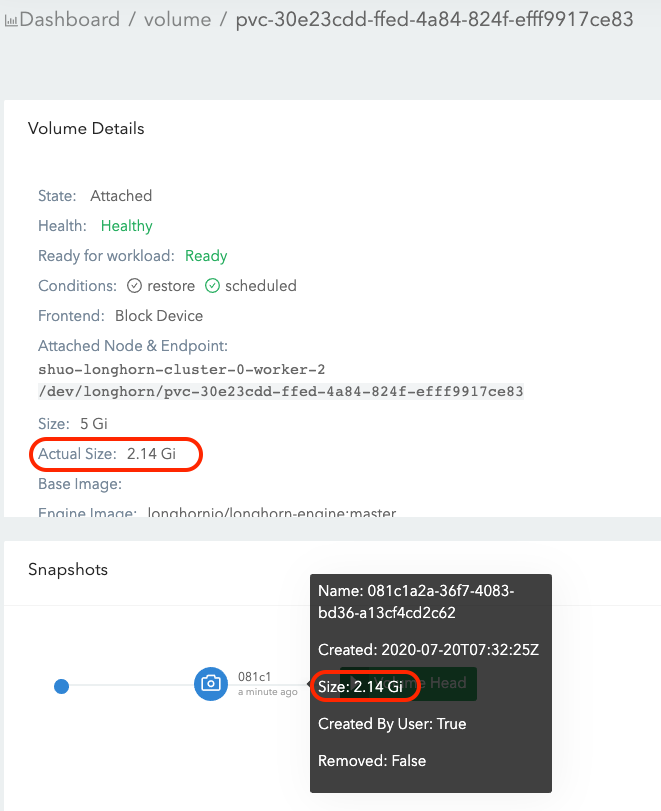
- Now data#1 is stored in snapshot#1 and the
- Delete data#1 from the mount point.
- The truth of the data#1 deletion is that the data#1 is marked as removed in the filesystem level (For example, inode deletion in ext4). Since Longhorn operates on the block level and does not understand the filesystem, as a result, the disk blocks/space storing data#1 won’t be released after the deletion.
- The data#1 filesystem level removal info is stored in current volume head file. For snapshot#1, data#1 is still retained as the historical data.
- The
actual sizeis still 2Gi.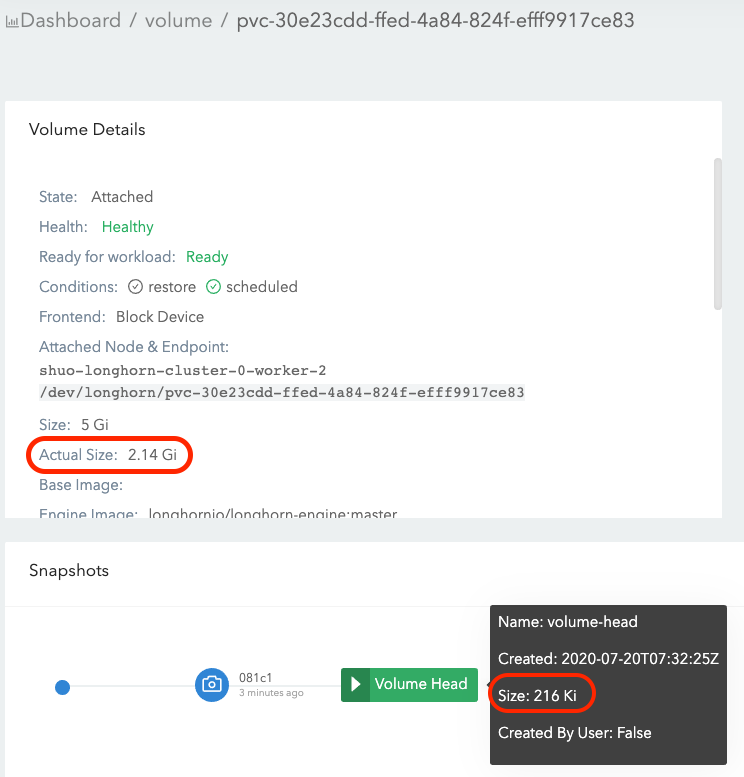
- Write 4Gi data (data#2) in the volume mount, then take one more snapshot (snapshot#2). See Figure 3 of the illustration.
- Now the
actual sizeis 6Gi, which is greater than the nominalsize. - There is overlapping between 2 snapshots in block level (See the 2 snapshots in Figure 3), since the data#1 is marked as removed in snapshot#2 then the filesystem reuses the space.
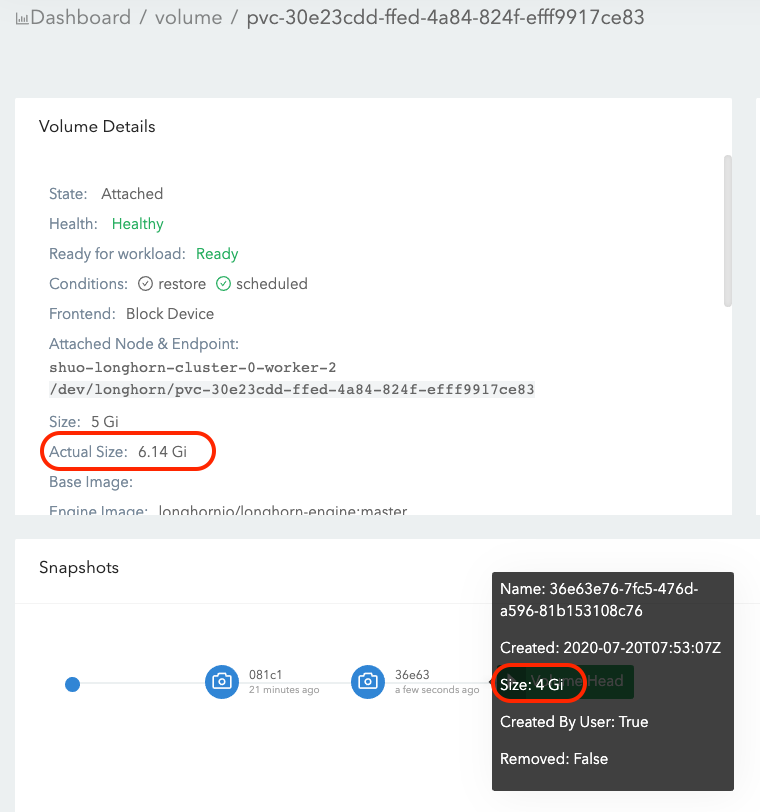
- Now the
- Delete snapshot#1 and wait for snapshot purge complete. See Figure 4 of the illustration.
- Here Longhorn actually coalesces the snapshot#1 with the snapshot#2.
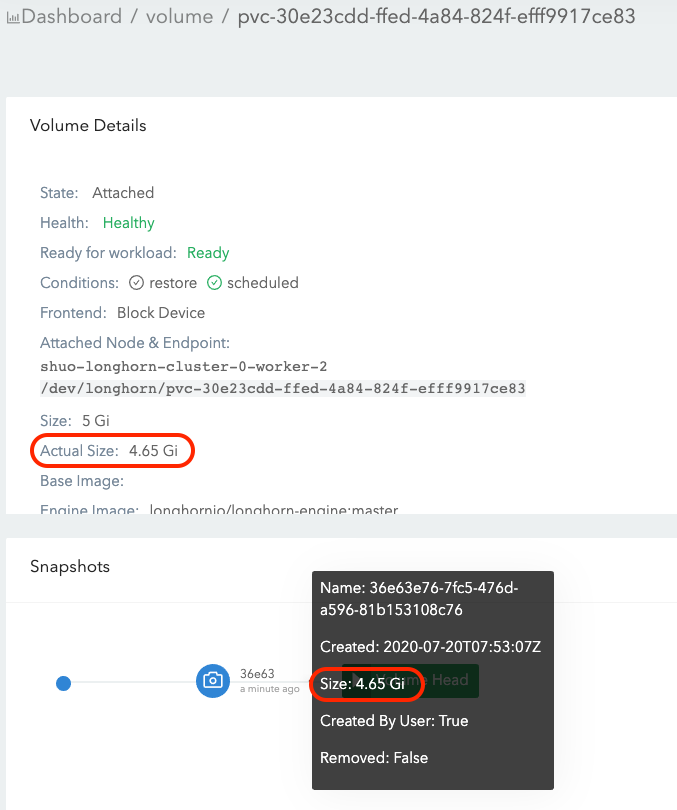
- For the overlapping part during the coalesce, the newer data (data#2) will be retained in the blocks. Then some historical data is removed and the volume gets shrunk (from 6.1Gi to 4.65Gi in the example).
© 2019-2025 Longhorn Authors | Documentation Distributed under CC-BY-4.0
© 2025 The Linux Foundation. All rights reserved. The Linux Foundation has registered trademarks and uses trademarks. For a list of trademarks of The Linux Foundation, please see our Trademark Usage page.